Preserving the Harvest: Canning Tips for Urban Gardeners
cricbet99, sky11 bet, play lotus365:Preserving the Harvest: Canning Tips for Urban Gardeners
So, you’ve spent months tending to your urban garden, carefully nurturing your crops to perfection. The time has finally come to harvest your bounty, but what do you do with all that produce? One of the best ways to preserve your garden’s harvest is through canning. Canning not only helps extend the shelf life of your fruits and vegetables but also allows you to enjoy that fresh garden taste year-round.
Before you dive into the world of canning, there are a few tips and tricks that every urban gardener should know. From choosing the right produce to proper canning techniques, here’s everything you need to know to preserve your harvest like a pro.
Choosing the Right Produce
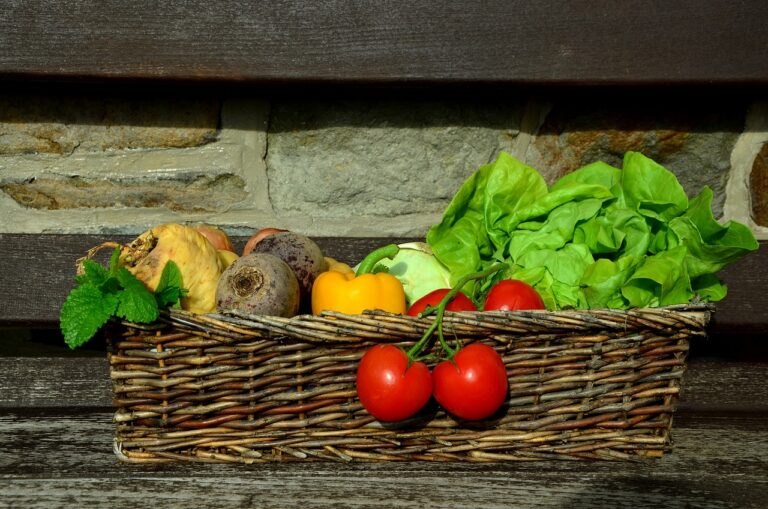
The first step in successful canning is choosing the right produce. Not all fruits and vegetables are suitable for canning, so it’s essential to select varieties that will hold up well during the canning process. Look for produce that is ripe but still firm, as overly ripe fruits and vegetables can become mushy when canned.
Some popular options for canning include tomatoes, cucumbers, peppers, peaches, and berries. These fruits and vegetables can be canned whole, sliced, or crushed, depending on your preference.
Preparing Your Produce
Once you’ve selected your produce, it’s time to prepare it for canning. Start by washing your fruits and vegetables thoroughly to remove any dirt or debris. For fruits like peaches or tomatoes, you may need to peel and pit them before canning. Vegetables like cucumbers or peppers may need to be sliced or diced before proceeding.
It’s essential to follow proper sanitation practices when preparing your produce for canning. Make sure your utensils, cutting boards, and canning equipment are clean and sanitized to prevent the growth of harmful bacteria.
Choosing the Right Canning Method
There are two primary methods of canning: water bath canning and pressure canning. Water bath canning is suitable for high-acid foods like fruits, tomatoes, and pickles, while pressure canning is necessary for low-acid foods like vegetables and meats.
For urban gardeners just starting with canning, water bath canning is the most straightforward method to master. All you need is a large pot, canning jars, lids, and a jar lifter. Pressure canning requires a specialized pressure canner, which can be a more significant investment for beginners.
Stocking Up on Canning Supplies
Before you start canning, make sure you have all the necessary supplies on hand. In addition to canning jars, lids, and a pot for water bath canning, you’ll also need a few other essentials, including:
– Canning funnel: Helps you fill jars with hot liquids without making a mess.
– Bubble remover: Ensures there are no air bubbles trapped in your jars.
– Magnetic lid lifter: Makes it easy to lift hot lids out of boiling water.
– Jar lifter: Allows you to safely lift hot jars in and out of the canning pot.
– Labels and markers: Essential for labeling your canned goods with the date and contents.
Following Proper Canning Techniques
Once you have all your supplies ready, it’s time to start canning. Follow these simple steps for successful water bath canning:
1. Prepare your canning jars by washing them in hot, soapy water and sterilizing them in boiling water for ten minutes.
2. Fill a large pot with water and bring it to a boil. Place your jars in the pot to keep them hot while you prepare your produce.
3. Prepare your fruits or vegetables according to your chosen recipe.
4. Fill your hot jars with the prepared produce, leaving the recommended amount of headspace at the top.
5. Wipe the rims of the jars with a clean, damp cloth to ensure a tight seal.
6. Place the lids on the jars and screw on the bands until they are fingertip tight.
7. Lower the jars into the boiling water using a jar lifter, making sure they are covered by at least one inch of water.
8. Process the jars in boiling water for the recommended amount of time, as specified in your recipe.
9. Carefully remove the jars from the water bath and let them cool on a towel on the counter.
10. Check the seals on your jars by pressing down on the lid it should not move or make a popping sound.
FAQs About Canning
Q: Can I reuse canning lids?
A: No, canning lids are designed for one-time use only. Reusing lids can result in a failed seal and potentially unsafe canned goods.
Q: How long do canned fruits and vegetables last?
A: Properly canned fruits and vegetables can last up to a year or more if stored in a cool, dark place. Be sure to check for signs of spoilage before consuming canned goods.
Q: Can I adjust canning recipes to suit my taste preferences?
A: It’s essential to follow approved canning recipes precisely to ensure the safety and quality of your canned goods. Making adjustments to recipes can alter the acidity level, which can impact the safety of the canned product.
Q: What should I do if a jar doesn’t seal properly?
A: If a jar fails to seal properly, you can either reprocess it with a new lid or refrigerate the contents and consume them within a few days.
Q: Can I can meats and dairy products at home?
A: Canning meats and dairy products requires a pressure canner to ensure food safety. It’s best to follow approved recipes and guidelines for canning these types of foods.
Happy Canning!
Now that you have all the essential tips and tricks for canning your urban garden harvest, it’s time to get preserving! With a little practice and patience, you’ll soon be filling your pantry shelves with delicious homemade jams, pickles, and sauces. Happy canning!